
Understanding Git Branches: A Beginner's Guide
Learn how to create, switch, and manage branches in Git to organize your work efficiently.

In this post, we’ll take the next step after mastering basic Git commands—exploring how branches work in Git. Branching allows you to isolate your changes, test new ideas, and keep your main work clean.
We’ll work inside the same git-test directory used in the previous post.
(If you’re new to Git, check out the previous post first for a quick overview of essential commands.)
Check current branch
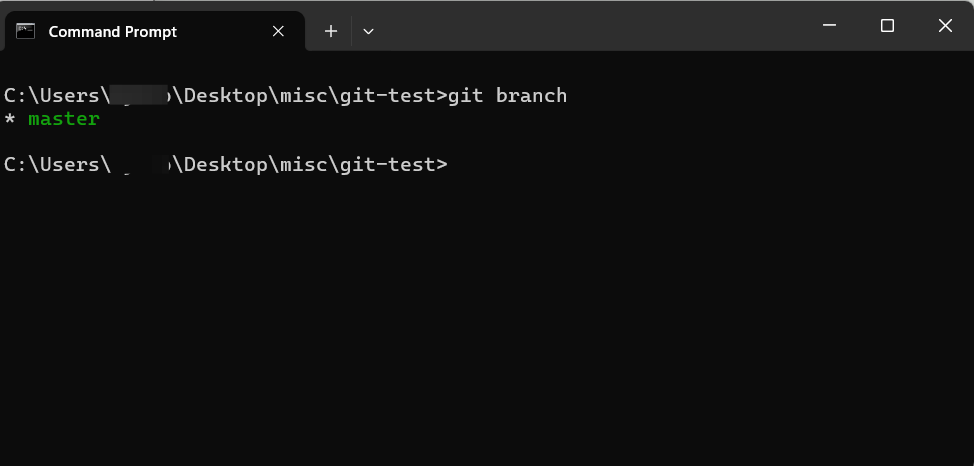
git branchThis shows all existing branches and highlights the one you're currently on.

This command lists all the branches in the repository.
The “* master” output indicates that you are currently on the “master” branch.
Since no other branches have been created yet, only “master” is shown.Create a new branch
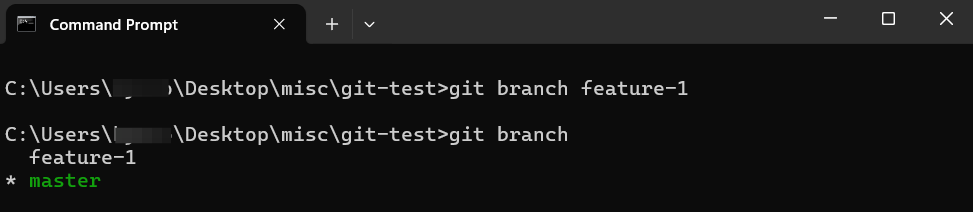
git branch feature-1This creates a new branch called
feature-1. It doesn't switch to it automatically.
After the creation of a new branch named
feature-1, when running git branch,now it shows the new branch feature-1 alongside master, while you're still on the
masterbranch.Switch to another branch
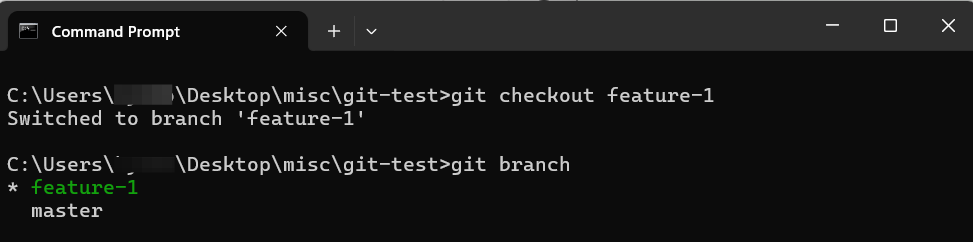
git checkout feature-1Now you’re on the new branch! You can safely make changes without affecting the main branch.
Tip: You can combine create and switch with one command using
git checkout -b feature-1.
After running command git checkout feature-1, you switched into feature-1 branch to use. So when executing git branch command, it shows that you’re now on feature-1, indicated by the asterisk with green colored text.
Merge a branch
git checkout main
git merge feature-1
Switch back to
mainand merge the changes fromfeature-1.
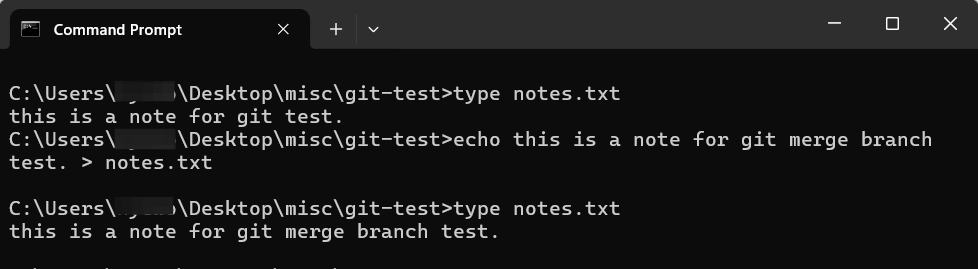
First, the type [filename] command shows the content of notes.txt file. And then echo command overwrites it with the content you would like to put. Once you check the content after overwriting it, the content in notes.txt file is changed.

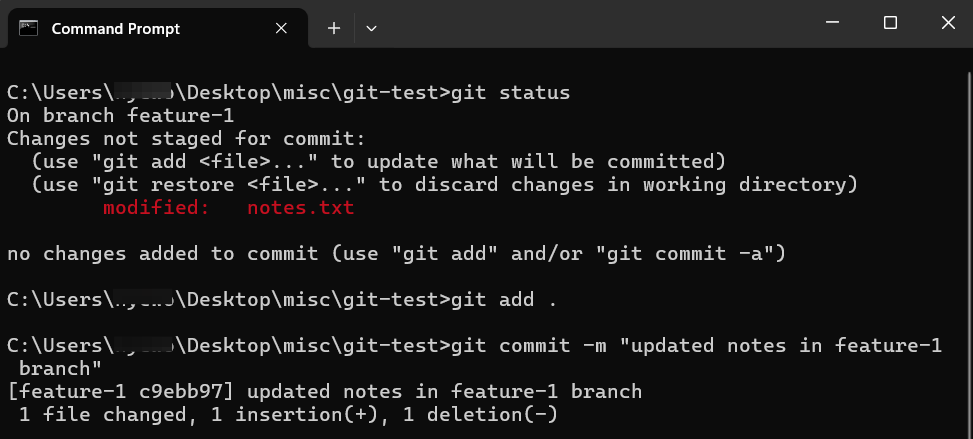
Then you can see that the changes have made but not staged when running “git status”. After staging it with “git add .”, commit the changes with a message with “git commit -m “[message]” ”.
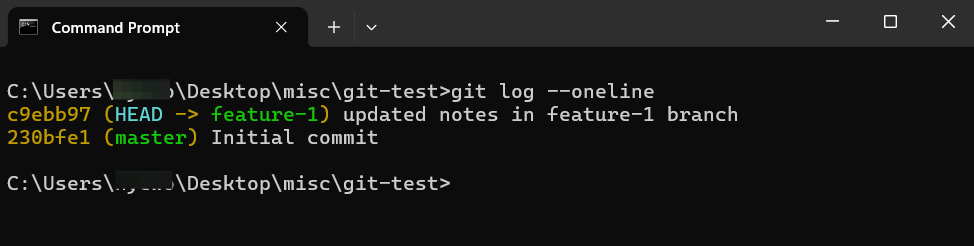
After committing the changes, you can see the commit history in one line on feature-1 branch with “git log --oneline”.

Finally switch to master branch, merge the feature-1 branch into master branch with “git merge [branch name]”. After that, you can see feature-1 commit is merged into master branch with “git log” command.

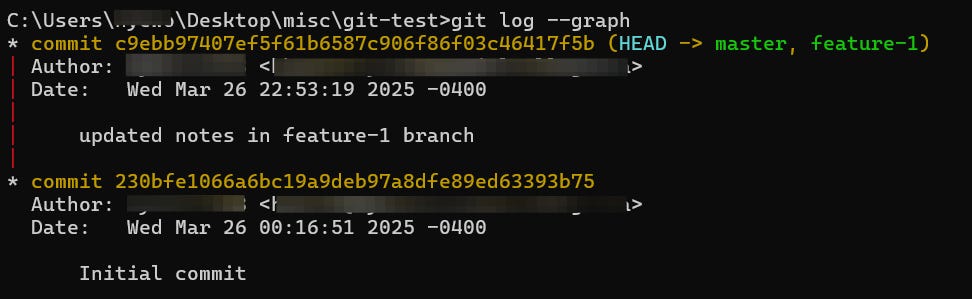
You can also see the commit history visually with --graph option. Here, the asterisks show a linear history, and both
masterandfeature-1point to the same latest commit, confirming the successful merge.Delete a branch
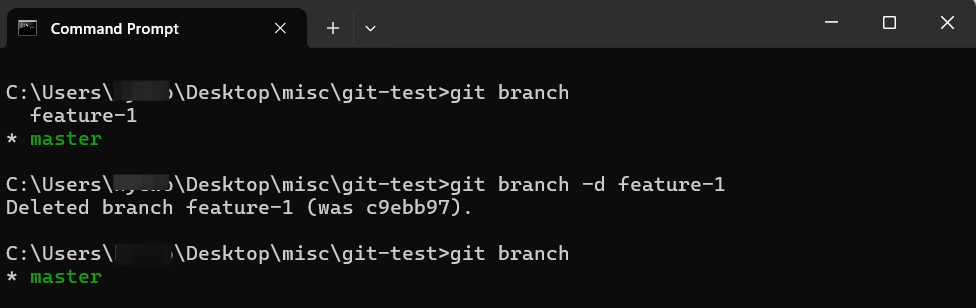
git branch -d feature-1After merging, you can safely delete the branch to keep things clean.


Branching is a key concept in Git that helps manage parallel work. Mastering it early will make collaboration and experimentation much easier.