
What is nvm? A Simple Guide to Node Version Manager on Windows
Tired of switching Node.js versions manually? Learn how nvm makes it effortless.

When working on multiple JavaScript projects, you may notice that different projects require different versions of Node.js. Manually uninstalling and reinstalling Node every time gets old fast.
That’s where nvm (Node Version Manager) comes in.
It's a simple tool that lets you install and switch between multiple versions of Node.js on your machine.
🧐 What is nvm?
nvm stands for Node Version Manager.
It’s a tool that helps you manage multiple versions of Node.js on the same machine — super useful when different projects rely on different Node versions.
Originally built for macOS/Linux, there's now a well-maintained nvm-windows version that works great on Windows.
✅ Why Use nvm?
Avoid version conflicts between projects
Test your code across different Node versions
Easily switch Node versions with one command
Keep your global npm modules project-specific
🖥️ Installing nvm on Windows
On Windows, you'll want to use nvm-windows, a maintained version specifically built for Windows.
Download the installer from the releases page.
Run the installer and follow the setup.
Restart your terminal (Command Prompt or PowerShell).
⚙️ Common nvm Commands
Here are some useful nvm commands you'll probably use often:
nvm list                      # Show installed Node versions
nvm install 18.16.1           # Install a specific Node version
nvm use 18.16.1               # Switch to that version
nvm uninstall 18.16.1         # Remove a version
🔎 The version
18.16.1is just an example.
You can replace it with any other version you need, such as20.11.1or16.20.2.
If you're wondering whether the version you need is available,
the next command helps you check exactly that 👇
📸 Checking available node versions:
Let’s say you’re not sure which Node version you need, or want to check what’s currently available to install.
Run the following command:
nvm list available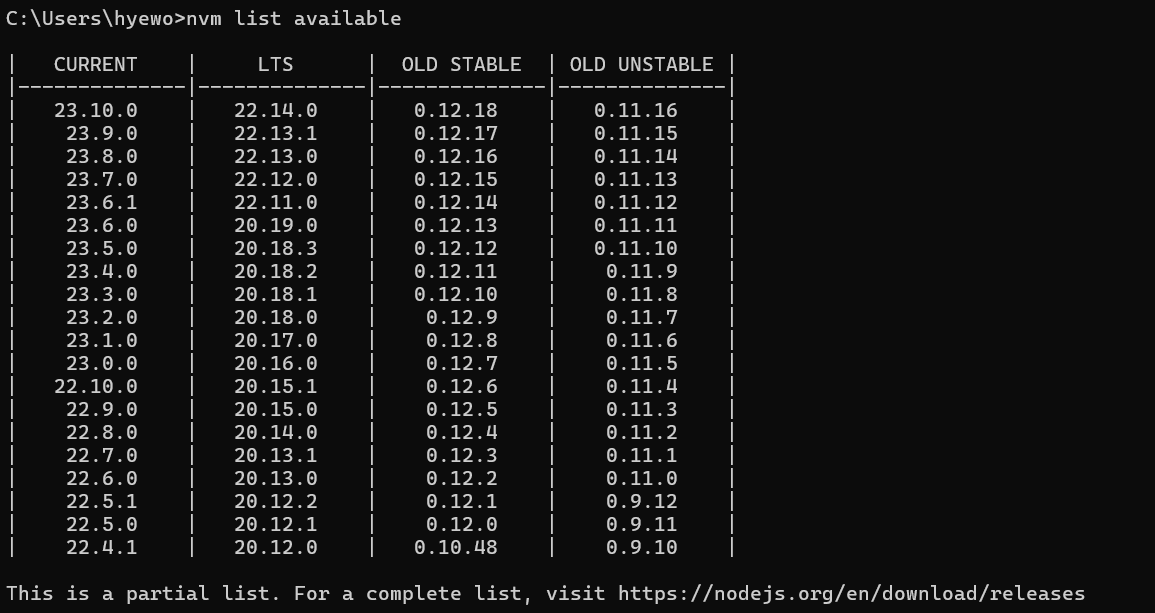
This command lists a partial set of available Node.js versions, grouped by release types like CURRENT, LTS, and OLD STABLE.
For the full list, follow this link.
Now that you’ve checked which Node.js versions are available,
you can go ahead and install the one you need — and start using it right away.
Let’s walk through that process 👇
💻 nvm list
nvm listShows the versions of Node.js you’ve already installed locally using nvm.
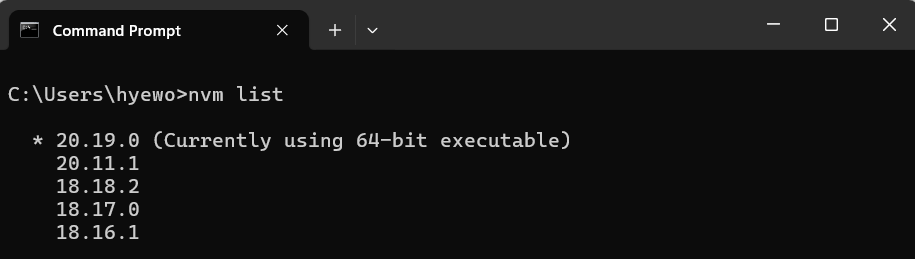
This shows all Node.js versions currently installed via nvm.
The asterisk (*) indicates that version 20.19.0 is the active one in use.
🔄 nvm use
nvm use 18.16.1Switches your active Node.js version to 18.16.1 (or any version you've installed).
💡 You’ll need to install a version first using
nvm install <version>before you can switch to it.

The command nvm use 18.16.1 switched the active Node.js version to 18.16.1.
The updated nvm list output confirms this switch, as the asterisk now appears next to 18.16.1.
🔍 node -v
node -vQuickly check the current version of Node.js in use. This helps confirm your nvm use command worked.

This confirms that the system is now using Node.js version 18.16.1, matching the version selected via nvm.
🔁 Use Cases
Let’s say you’re working on two projects:
Project A needs Node v18.16.1
Project B requires v20.11.1
Instead of constantly reinstalling Node, you just run:
nvm use 18.16.1
# or
nvm use 20.11.1
And you're ready to go. No hassle.
✨ That’s it!
Once you get used to nvm, you’ll wonder how you ever lived without it.